
The Biodynamic French Intensive System
Examples of Alan Chadwick's Garden Techniques
Section 1
For a video series on intensive tecniques using raised beds, see here.
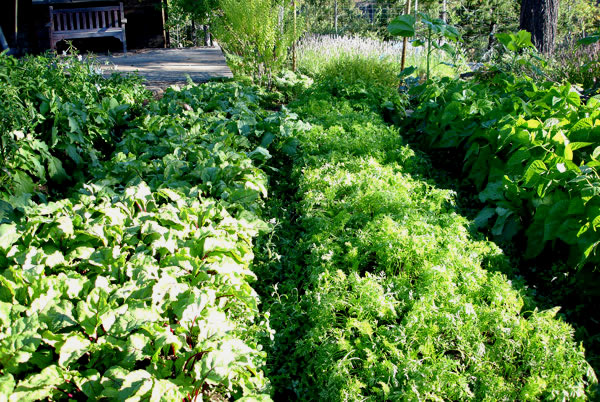
Left center: Beets (Detroit); Right center: Carrots (Red Cored Chantenay); Right: Bush beans (Blue Lake)
In order to obtain the finest quality vegetables, growth must be continuous and rapid. If plants are stopped in their growth, by too much or too little water, for example, they will begin worrying about death and how to circumvent death by making seeds that will ensure the survival of future generations. But as soon as a plant begins to think about seed production, it becomes tough and bitter, no longer fit for the table. This condition must be avoided at all costs.
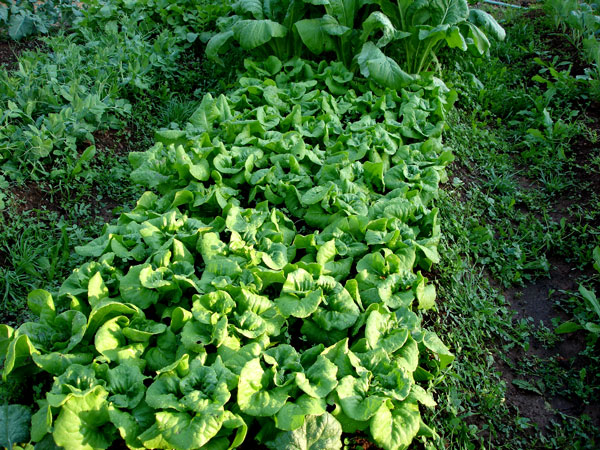
One way to protect plants from the effects of drying out, excessive cold, etc, is by creating a layer of thermal control between the surface of the soil and the canopy of their leaves. By spacing the plants in the bed close enough together, the leaf canopy is complete when the plants near their full size. This holds in moisture and protects against the drying action of sun and wind. Alan Chadwick called this spacing arrangement the "conservatoire," a French word meaning greenhouse. Just as a greenhouse protects plants from the harsh weather, so also the correct spacing of the plants in the beds creates a protected zone at the soil surface. This also prevents a surface crust from forming on the soil and choking the plants around their crowns.
As a slight variation on the Chadwick theme, the carrots and beets in this photograph are not sown broadcast, as Alan typically did, but are sown in close rows — 4 or 5 rows per bed for the carrots, and 3 rows per bed for the beets. This allows for the possibility of cultivation while the plants are still small, which keeps them growing quickly and happily, allowing the water to easily enter the soil, and also allowing the soil to breathe. The row arrangement also allows for a top dressing of well-rotted manure to be applied midway through out the growth cycle, which acts as a crust-preventing mulch during the time in which the plants have not yet developed to the point at which they cover the bed completely. Such treatment is not entirely heresy, since Alan always used this system for Swiss chard.
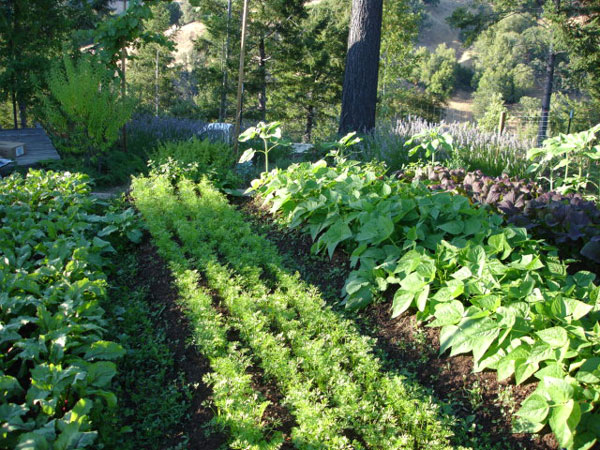
The same carrot bed as above, but at a younger stage, where the rows are still visible.
The garden beds are always oriented north-south so that the sun will strike each bed directly for at least a part of every day, even if taller crops are grown in the adjacent beds. If the beds were to run east-west, taller crops to the south would continuously shade lower-growing plants to the north, and this would be disaster. The easiest way to determine true north is to observe the North Star, Polaris, in the evening, and drive into the ground a series of sticks on a line between the center of your garden and this star. The next day you can measure off parallel distances from this initial line, to lay out your beds. If, instead, you use a compass, be sure to correct for magnetic declination, the angular difference between true north and magnetic north. Government quad maps show this adjustment, or else ask your local land surveyor.
The width of the beds is determined by how far you can conveniently reach. From the path on each side, you should be able to reach to the center of the bed without too much effort; about 4 to 4 1/2 feet wide (from center of path to center of path) is pretty normal. The other factor to keep in mind is that you want to be able to straddle the bed with your legs as you transplant out from seed flats. After carefully cultivating the soil, the last thing you want to do is walk on the bed, so although it takes a bit of getting used to, straddling is the ticket. I find that I am not quite as flexible as I once was, and so tend to make my garden beds a tiny bit narrower than in former years.
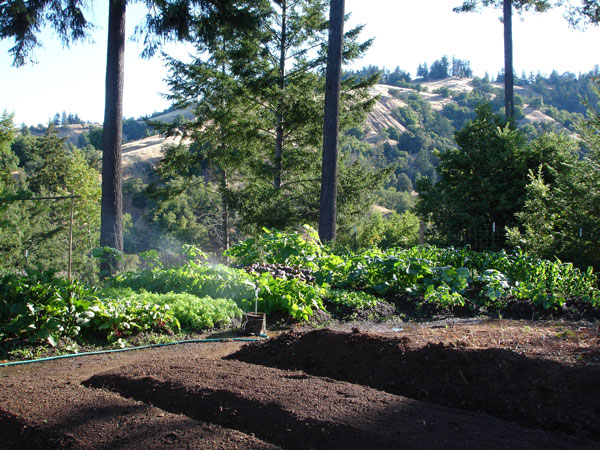
The paths between beds are to be as narrow as possible, never more than about 6" wide. This prevents the waste of garden space, and also acts so as to expand the zone of thermal control across from one bed to the other. This will prevent the edges of your beds from drying out excessively. Be sure to dig right to the center of your paths every time you redig your beds. Throw the soil from the paths into the center of your beds, and this will create the kind of structure you want: raised beds above a lower path area. Make sure the paths between beds drain out. This will usually require that you drop the level of the soil at each end of your beds, where you will have larger paths that frame your beds (see photograph).
Alan used to say that it was the ancient Greeks who first discovered that plants grow best on landslides. The same principle holds true in meadows where the grass always grows taller when it is growing in the mound of soft soil created by a gopher. It was a favorite saying of Alan's that, "The gardener imitates nature." The system of raised beds has the following advantages:
- It ensures perfect drainage. Since the crowns of the plants are always at least 6" to 8" higher than the path between beds (which must always drain out, as stated above), there is never any danger that the plant will become water-logged, and thus stop in its growth. This is essential above all other considerations.
- The soil raised in this way will always be sacred, that is: off limits to any walking. All work on the bed will be from the sides, or by straddling, and so this soil will never be recompacted. The only exception to this is when clearing and redigging the bed.
- As mysterious as it may seem, the life-forces tend to rise, and so plants higher in elevation will thrive more than their neighbors down below.
- The sun will warm the sides of the beds during the cooler period of early spring, and this will encourage your seeds to germinate and better stand up to the challenge of braving the cold weather once they begin growing.
The Sow Thistle (sonchus)
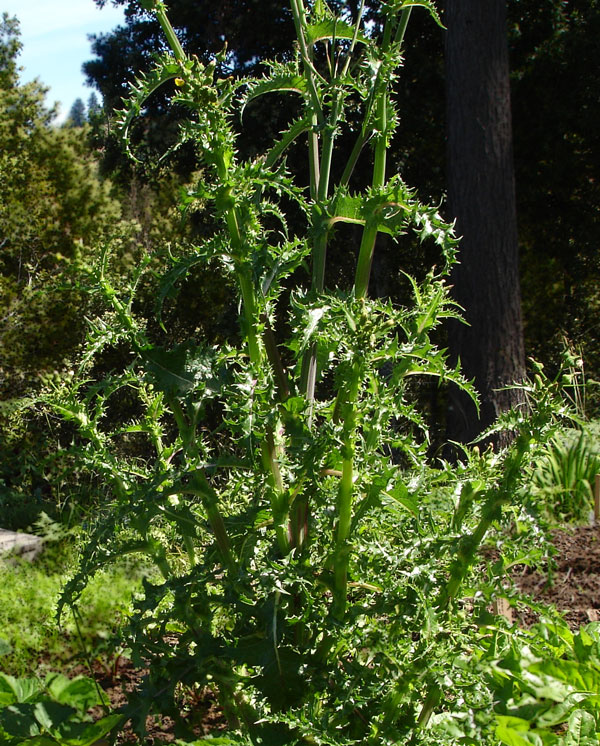
Sonchus
Once, in the early days, I foolishly pointed to something growing in the garden at Santa Cruz and asked Alan Chadwick if it were a plant or a weed. He said, "Don't be silly sausage, they're all plants. It's just that, if a plant is growing where we don't want it to grow, then we call it a weed." He went on to explain that some wild plants, often referred to as weeds, have enormously beneficial properties that they bring to the garden, and that we must make a place for them wherever we can.
One of his favorites of this class of "biodynamics," as he called them, is Sonchus, otherwise known as the Sow Thistle, which he forbade anyone to yank out. It is no proper thistle at all, as the wicked looking spines on the leaves are as soft as lettuce leaves, to which it is related. It is succulent through and through and makes the best possible compost. Most important of all, it has a tap root that extends down a good three feet or so, and this root continually brings up essential mineral elements from down deep and incorporates them into the entire plant. So then, when it eventually ends up on the compost pile, all those important minerals become incorporated into the compost for the benefit of future crops. The photograph shows one such Sonchus plant that came up in the strawberry bed. I was oh-so-tempted to pull it out, as I like to see uniformity and geometry in my garden. But I resisted in this case, as a kind of tribute to Alan Chadwick, who one time caught me having pulled out a good sized Sonchus from a carnation bed in Santa Cruz. The story can be found in my audio recording called, "Alan Chadwick Gently Chides a Disobedient Apprentice." They become impossibly large and unruly.
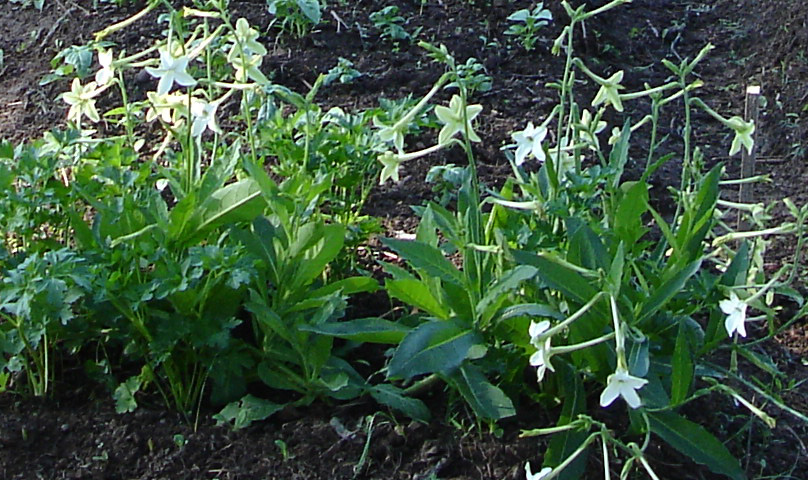
Nicotiana Affinis
For me, nothing evokes a Chadwick garden like the fragrance of Nicotiana in the evening. The flower is not particularly showy, in fact it only opens when the sun goes down in the late afternoon; all day long it shrivels up and looks like nothing. But as night comes on, the flower opens and a most intoxicatingly delicious scent begins to fill the air of the garden. Scientists say that the sense of smell is the sense most connected to memory, and I can attest that whenever I catch a whiff of Nicotiana on a summer's evening, I am transported back to Santa Cruz, California, 1970.
The garden was always full of Nicotiana, as Alan had forbidden anyone to remove it from wherever it had seeded itself. But of all places, I remember it being most prolific in the nursery, my personal domain during most of the time I worked in that garden. My campsite was outside the garden fence among the redwood trees below the nursery, so just about every night, after eating a weary dinner in the chalet, I would wend my way through the nursery, passing numerous Nicotiana plants as I descended to the bottom of the hill where there was a place I could get over the fence and out into the woods. Sometimes, if the wind was right, the scent of the Nicotiana followed me out into the forest, and all night long I would be in paradise. 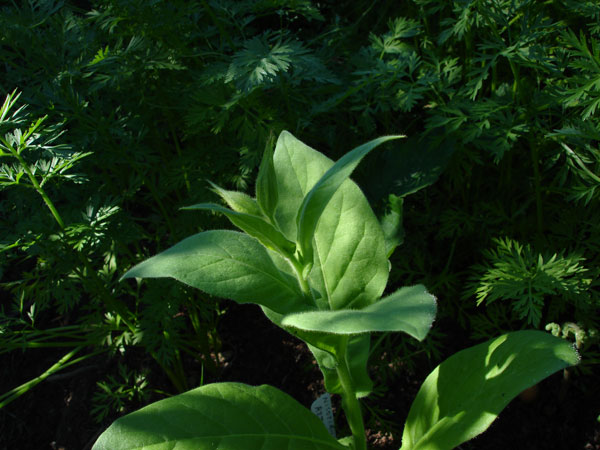
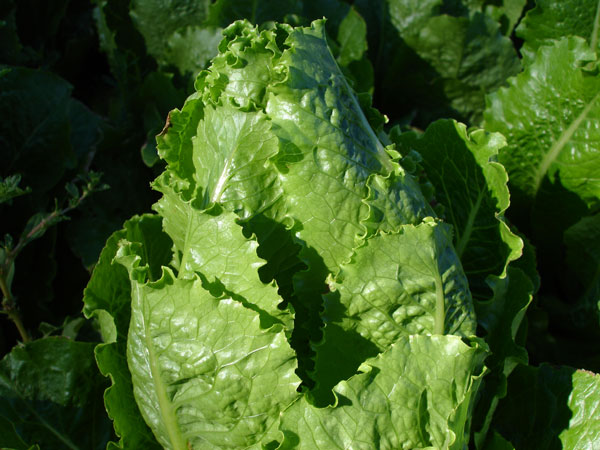
Nicotiana Affinis, foliage
Alan Chadwick prized it not only for its scent; it was also one of the best biodynamics. The sticky hairs on its leaves and stem were very effective at trapping aphids, which were drawn to its nighttime perfume like sailors to a siren, and this would ensure that we never had any serious infestation of aphids in the gardens. Nicotiana is actually a member of the tobacco family. Its seed is so small that it is difficult to propagate, but once established, it will self-sow quite prolifically. It likes a rich, well-drained soil with a fair amount of shade and plenty of moisture. But by all means, do not go for the colored varieties, as they have almost no fragrance. Only the pure white one is worth the effort, and that one is enchanting.
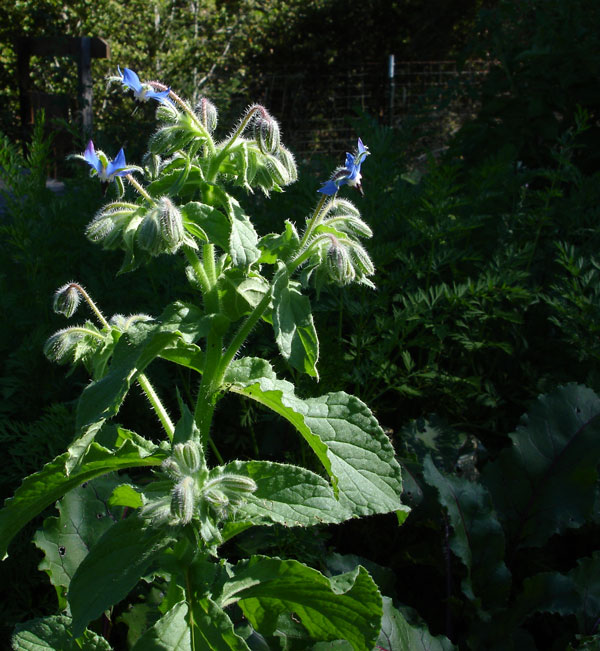
Borage (Borago officinalis ) in bloom
Borago
I personally cannot imagine having a garden that is not full of borago coming up here, there, and everywhere. You just get hold of some seed, sow it in flats or directly in odd corners of the garden, and it will do the rest. Every year you'll have volunteers sprouting up in profusion, but they are not a nuisance in the slightest. In fact, they make good compost, are not tenacious, and you can even make a herbal infusion to drink from their leaves and flowers. I find that the color of the little flowers calms me down, makes me feel like I've found my home in the universe, and fills me with well-being. It takes absolutely no effort to grow the plant, just leave it where convenient, and remove the rest. Bees love it, so it also adds that essential bit of life to the garden.
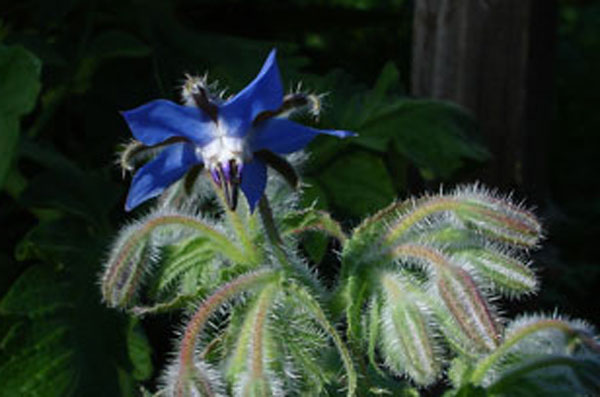
Borage, detail of the flower.
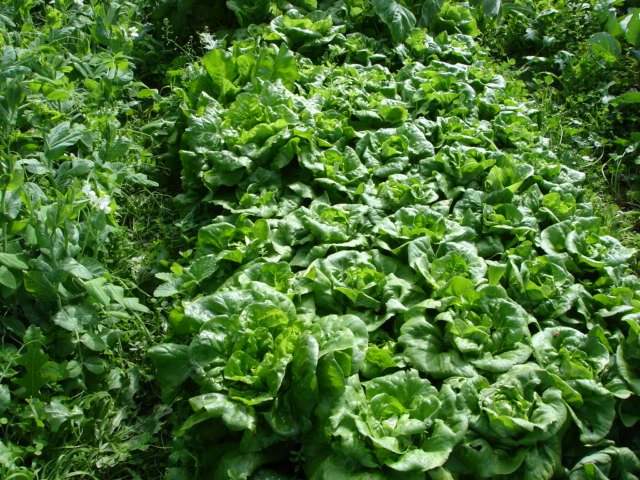
Bibb Lettuce
Although you may, from time to time, flirt with the buttercrunch, the cos, or the red leaf, you will inevitably find yourself coming back home to the bibb, who faithfully awaits your return without recriminations, happy just to be there for you. No doubt about it, the bibb is the classic lettuce, the standard against which all the others are described and compared. You must grow it quickly and without interruptions in its growth. The minute it experiences the fear of death, it turns bitter and begins to form seed.
Bibb Lettuce in the Biodynamic French Intensive vegetable bed.
Plan on sowing lettuce every month, timing its germination with the moon cycle. It will require more or less time to germinate, depending on the month you sow it: longer in the early spring when it's still chilly, shorter in the summer when the soil is warm. But in any case, try to manage it so that its date of germination coincides with a time two days before the new moon. In this way it will be swept up in the inclination of the moon and, like a surfer effortlessly riding a wave, it will coast gracefully to maturity and be as delicately sweet and tender as the girl of your fondest dreams.
Prepare the seed flats like this: Make a potting soil composed of one third sifted oak leaf mold, one third sifted sharp sand, and one third sifted loam soil. A sieve for sifting is essential. Make a frame of 1" x 4" wood, 2' x 2' in size. Cut a square of 1/4" hardware cloth to fit, then cover the edges with a narrow bit of lath so as not to injure your hands as you use the tool. Take your seed flat and cover the bottom with a layer of about 1/2" thick of oak leaves. Next make a stratification of well-rotted cow manure about 1/4" thick, and on that give a dusting of bone meal. Then fill your flat to the top, slightly pressing down to leave about 1/4" free at the top for your seed and cover soil. Then scatter your seed — not too thickly as a little goes a long way — and cover with very finely sifted potting soil (1/8" mesh sieve if you have it). Alan Chadwick's Golden Rule: Under-cover not over-cover. More sowings are ruined by over-covering the seed than by any other cause. A general rule of thumb is to cover the seed approximately three times its smallest dimension. If you over-cover, you will not get germination. If you under-cover, you will still get germination. In the latter circumstance, you can always lightly dust a bit more cover soil later, if it should become necessary. Set the flat in a spot that is about 50-50 sun and shade. Water gently with a Haws watering can, or equivalent, whenever the soil begins to dry out. But beware; it does not want to be sodden all of the time. There should be a natural cycle of drying and moistening similar to nature when, in the spring, there are moments of gentle showers interspersed with lovely sunny weather.
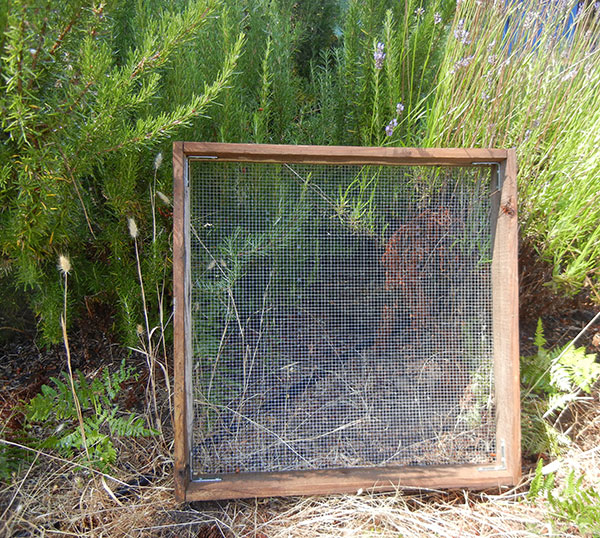
A garden sieve
When the little lettuce seedlings are about 1" or 1 1/2" tall, and beginning to crowd each other, the time has come to transplant. Wait until late afternoon when the shade has overtaken the garden. Then moisten a cotton cloth and, with a small hand fork, lift an area of about 3" square from your seed flat into the cloth, and cover it immediately. Do not, I repeat, DO NOT allow the rootlets to dry out while awaiting their transplanting, as this will defeat all your purposes. Have your bed prepared ahead of time: well tilthed, dressed with a good layer of composted cow manure with a dusting of bone meal or rock phosphate or whatever you use. Work that well in, but not too deep, no more than 6", and water well. After watering you need to let it amalgamate and dry out so that it is not sodden or muddy. This always takes at least 24 hours, so plan ahead.
Now that your bed is in perfect condition, you can begin the process of transplanting where we left off. With a good, clean trowel, make a hole in the soil for the beginning of your first row, which should start right at the shoulder of the bed. Then separate your lettuce seedlings by gently dropping the little clump from about 12" high so that the little jolt painlessly jostles the plants apart. Then grasping one plant by the tip of the leaf (never by the crown), tease it apart from the rest of the clump. Lay the plant (still holding it by the leaf tip) against the back of the hole, with its crown (the point where the roots meet the leaves) about 1/2" below the soil surface and its roots dangling down unobstructed. Then firm the soil around the plant so that its crown is at the surfacr and move on, always covering the clump with the cotton cloth between operations.
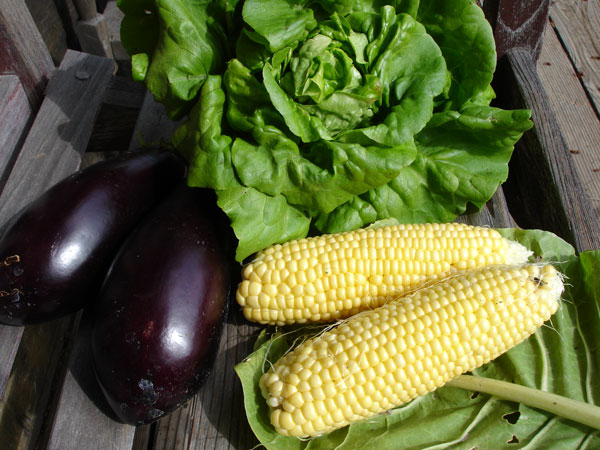
A head of bibb lettuce harvested at perfection
After planting two or three rows, water in with a little tin can full of water that has been pinched on one side to form a spout. NEVER allow water to touch the leaves of the plants, as this will stimulate leaf-growth, which is exactly what you don't want at this stage. By avoiding water contact on the leaves, you instead stimulate root growth which is absolutely necessary after transplanting. If you water well with the tin can, going around and around each seedling as the water seeps in, but never allowing it to touch the leaves, it will not need more watering for about three days, after which you can water overhead normally.
Cultivate every week or so between the staggered rows of lettuce with a small hoe. Alan called it a French hoe, which consists in just one finger-like prong for delicately loosening the grip of the encrusted soil around the crowns of the plants. Never allow the bed to get too dry. You achieve this by regular waterings, and by the proper spacing of your plants (about 6" with lettuce) so that their leaves just touch as they approach full size. This creates a zone of thermal control between the surface of the soil and the canopy of leaves above, between 2" and 4," that keeps everything fresh and nice and growing continuously. Harvest when the head forms up, but before it ever even thinks of bolting.
Click here to continue reading